

文章最后更新时间:
文章源自奇客源码-https://www.qkget.cn/2968.html
用Cloudflare Workers部署挪车页面文章源自奇客源码-https://www.qkget.cn/2968.html
前期准备
- 已经托管到Cloudflare的域名一个
- 挪车源代码
- WXPusher的
AppToken、UIDs
部署流程
WxPuhser
- 访问WxPusher官网,微信扫码登录
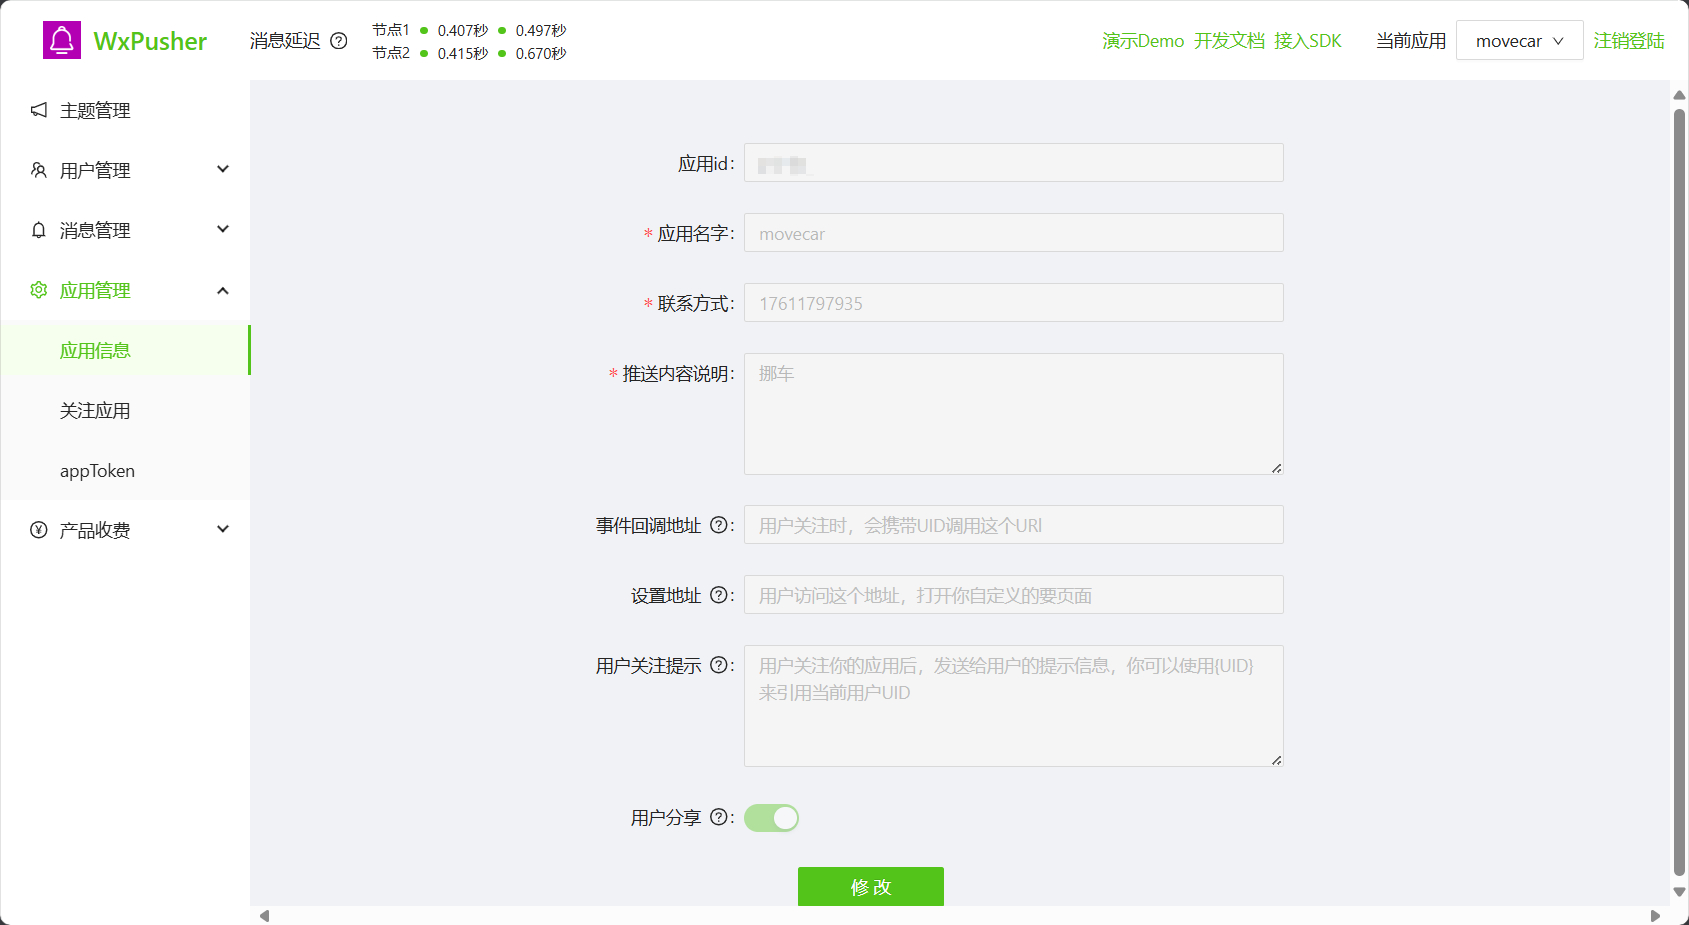
- 单击「应用管理」,「应用信息」,应用名字填写
movecar,联系方式填写手机号,推送内容随便写,这里填写挪车
 文章源自奇客源码-https://www.qkget.cn/2968.html
- 单击左侧「appToken」,未创建应用可能显示创建
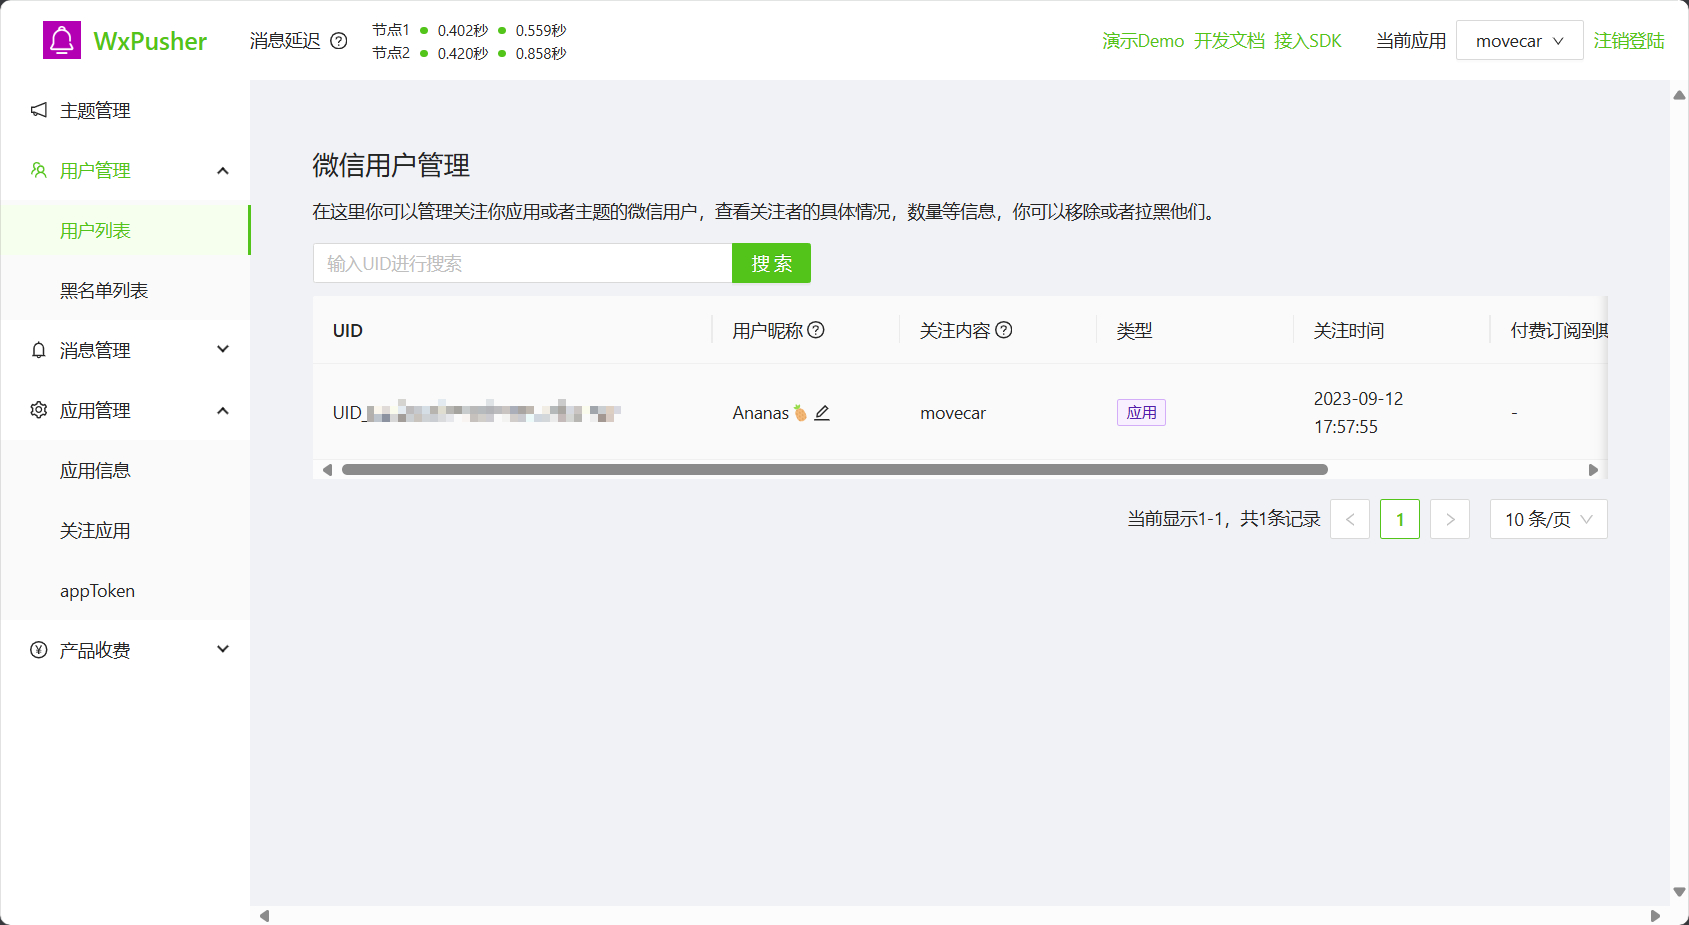
appToken等字样,创建后这里仅显示重置appToken,创建后记录下AppToken - 单击左侧「用户管理」、「用户列表」,记录下个人UID

准备好token和UID下一阶段用Cloudflare搭建部署起来
Cloudflare Workers
- 访问Cloudlare并登录。
- 单击「Workers 和 Pages」,「创建」
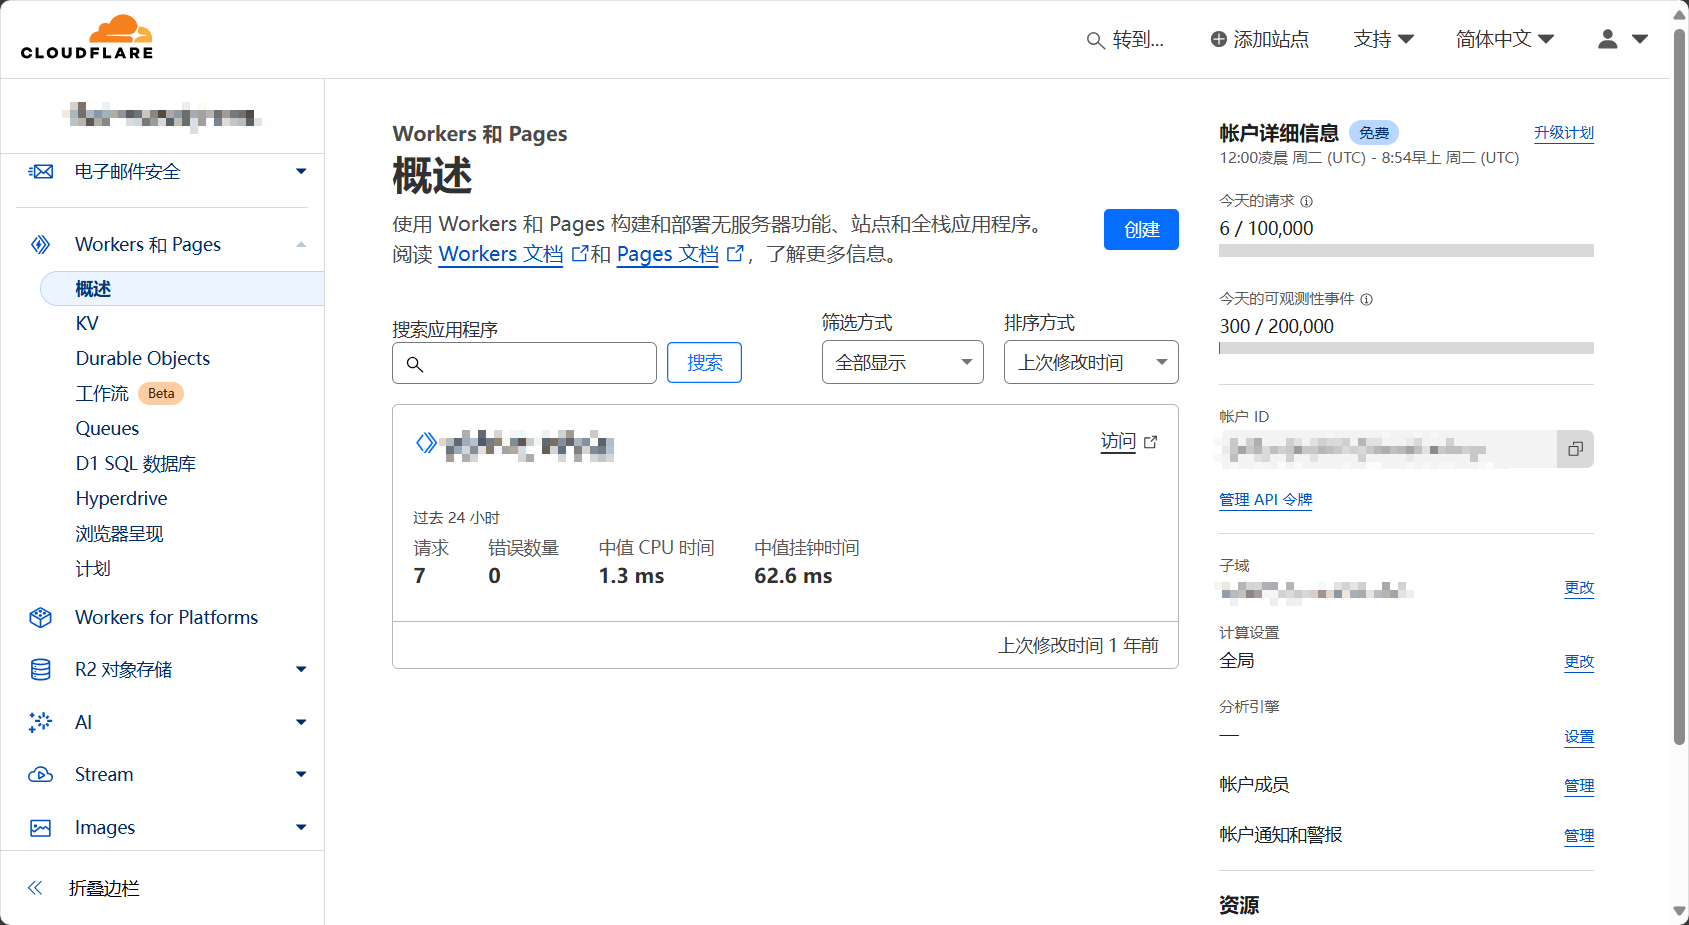 文章源自奇客源码-https://www.qkget.cn/2968.html
3.单击「创建Worker」文章源自奇客源码-https://www.qkget.cn/2968.html
 文章源自奇客源码-https://www.qkget.cn/2968.html
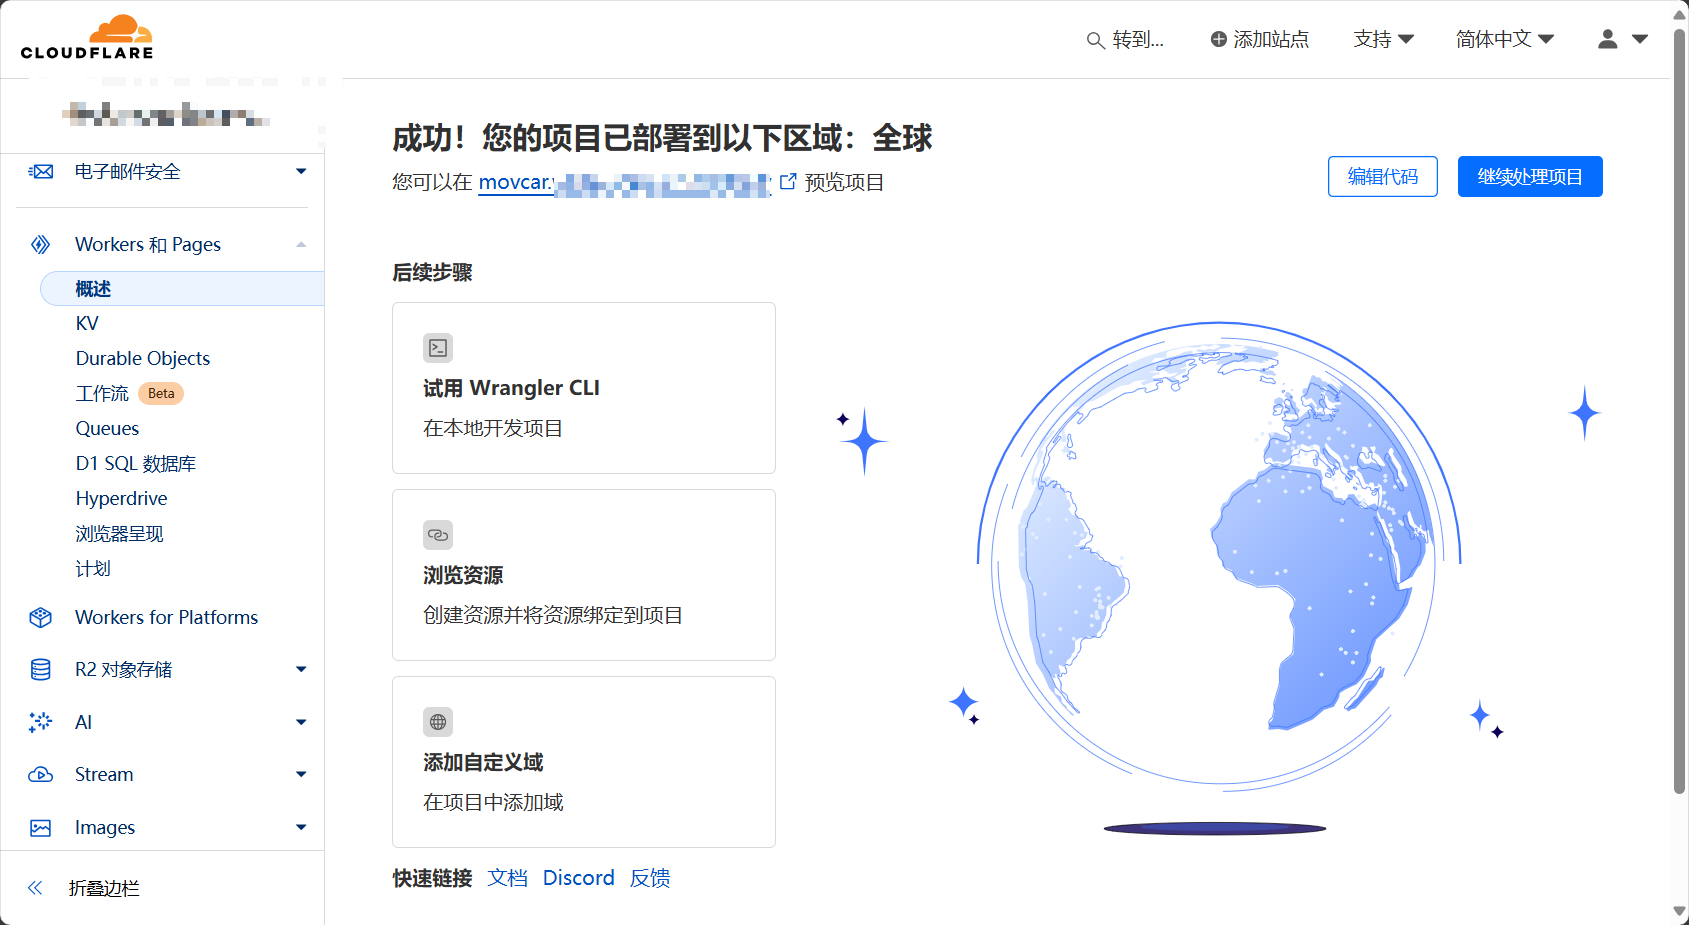
4.为Worker命名,我这里填写movecar,单击页面下方「部署」文章源自奇客源码-https://www.qkget.cn/2968.html
 文章源自奇客源码-https://www.qkget.cn/2968.html
5.单击「编辑代码」
 文章源自奇客源码-https://www.qkget.cn/2968.html
6.将提前准备好的挪车页面代码粘贴进去,替换好WXPusher相关的值,单击右上地址栏右面的「预览」文章源自奇客源码-https://www.qkget.cn/2968.html
 文章源自奇客源码-https://www.qkget.cn/2968.html
附上挪车代码:
addEventListener('fetch', event => {
  event.respondWith(handleRequest(event.request))
})

async function handleRequest(request) {
  const phone = '18888888888' // 车主的手机号
  const wxpusherAppToken = 'AT_vAxWMmK123UyvrBZszr123fWeGqW1e17' // Wxpusher APP Token
  const wxpusherUIDs = ['UID_x5dZ9X3P123VOE3ttPvfX12341xU'] // 车主的UIDs  , 'UID_d0pycYubbK6d766GNDo5deknw4i4'

  const htmlContent = `
    <!DOCTYPE html>
    <html lang="zh-CN">
      <head>
        <meta charset="UTF-8">
        <meta name="viewport" content="width=device-width, initial-scale=1.0">
        <title>通知车主挪车</title>
        <style>
          * { box-sizing: border-box; margin: 0; padding: 0; }
          body { font-family: Arial, sans-serif; display: flex; align-items: center; justify-content: center; height: 100vh; background: #f0f2f5; color: #333; }
          .container { text-align: center; padding: 20px; width: 100%; max-width: 400px; border-radius: 8px; box-shadow: 0 4px 8px rgba(0, 0, 0, 0.2); background: #fff; }
          h1 { font-size: 24px; margin-bottom: 20px; color: #007bff; }
          p { margin-bottom: 20px; font-size: 16px; color: #555; }
          button {
            width: 100%;
            padding: 15px;
            margin: 10px 0;
            font-size: 18px;
            font-weight: bold;
            color: #fff;
            border: none;
            border-radius: 6px;
            cursor: pointer;
            transition: background 0.3s;
          }
          .notify-btn { background: #28a745; }
          .notify-btn:hover { background: #218838; }
          .call-btn { background: #17a2b8; }
          .call-btn:hover { background: #138496; }
        </style>
      </head>
      <body>
        <div class="container">
          <h1>通知车主挪车</h1>
          <p>如需通知车主,请点击以下按钮</p>
          <button class="notify-btn" onclick="notifyOwner()">通知车主挪车</button>
          <button class="call-btn" onclick="callOwner()">拨打车主电话</button>
        </div>

        <script>
          // 调用 Wxpusher API 来发送挪车通知
          function notifyOwner() {
            fetch("https://wxpusher.zjiecode.com/api/send/message", {
              method: "POST",
              headers: { "Content-Type": "application/json" },
              body: JSON.stringify({
                appToken: "${wxpusherAppToken}",
                content: "您好,有人需要您挪车,请及时处理。",
                contentType: 1,
                uids: ${JSON.stringify(wxpusherUIDs)}
              })
            })
            .then(response => response.json())
            .then(data => {
              if (data.code === 1000) {
                alert("通知已发送!");
              } else {
                alert("通知发送失败,请稍后重试。");
              }
            })
            .catch(error => {
              console.error("Error sending notification:", error);
              alert("通知发送出错,请检查网络连接。");
            });
          }

          // 拨打车主电话
          function callOwner() {
            window.location.href = "tel:${phone}";
          }
        </script>
      </body>
    </html>
  `

  return new Response(htmlContent, {
    headers: { 'Content-Type': 'text/html;charset=UTF-8' },
  })
}
文章源自奇客源码-https://www.qkget.cn/2968.html
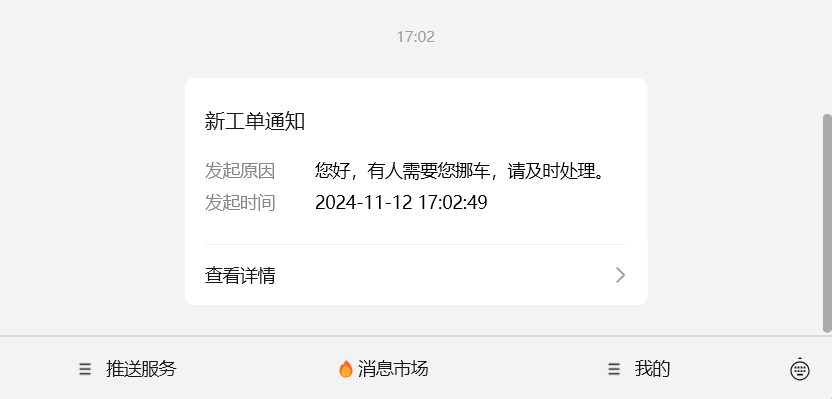
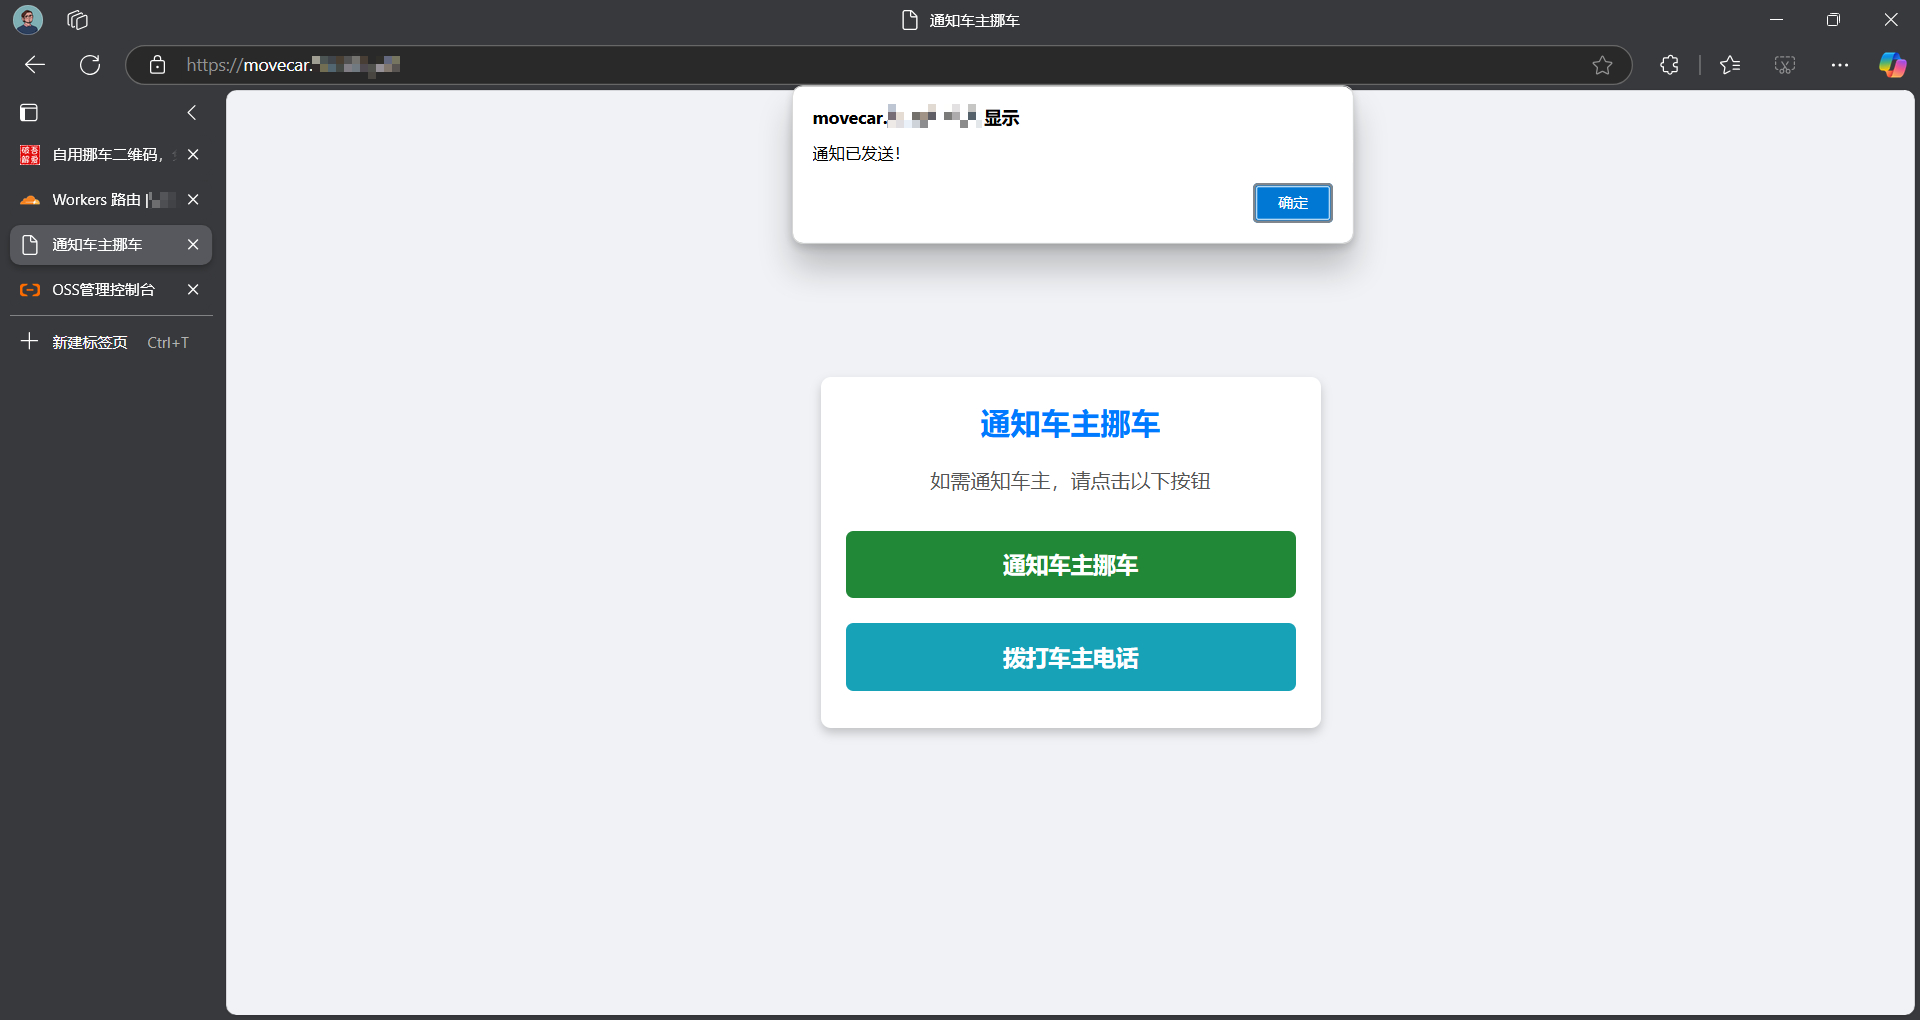
7.单击「通知车主挪车」,测试是否正常推送消息。文章源自奇客源码-https://www.qkget.cn/2968.html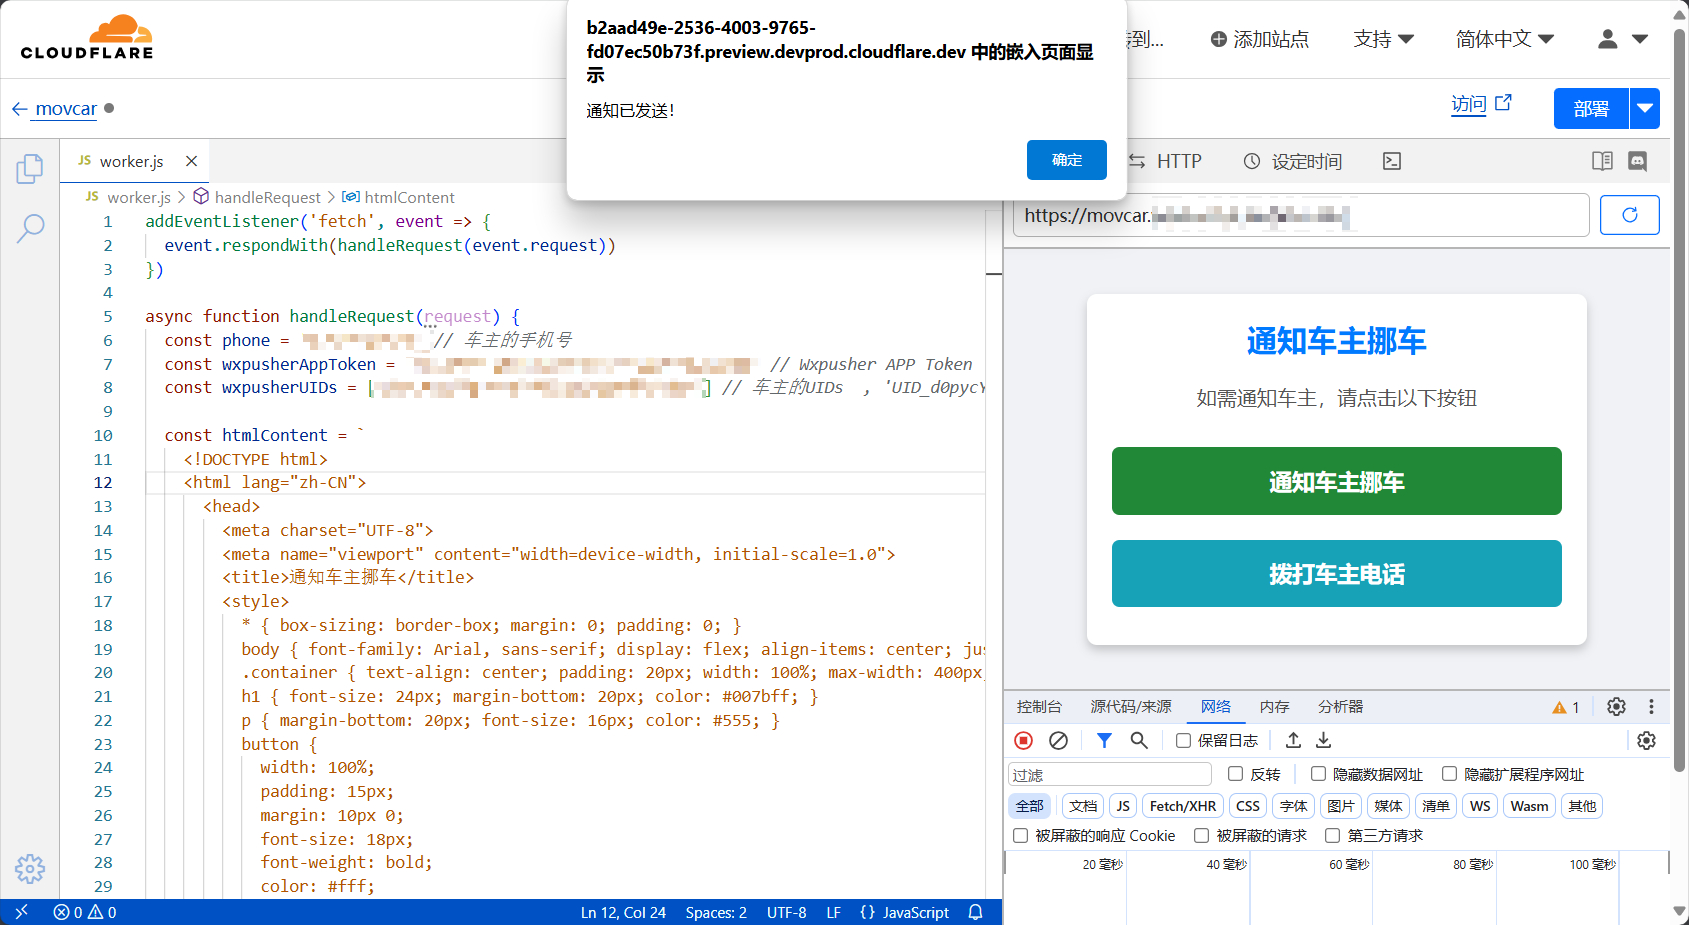
- 单击右上「部署」,等待部署完成
- 回到Cloudflare主页,单击托管的「域名」
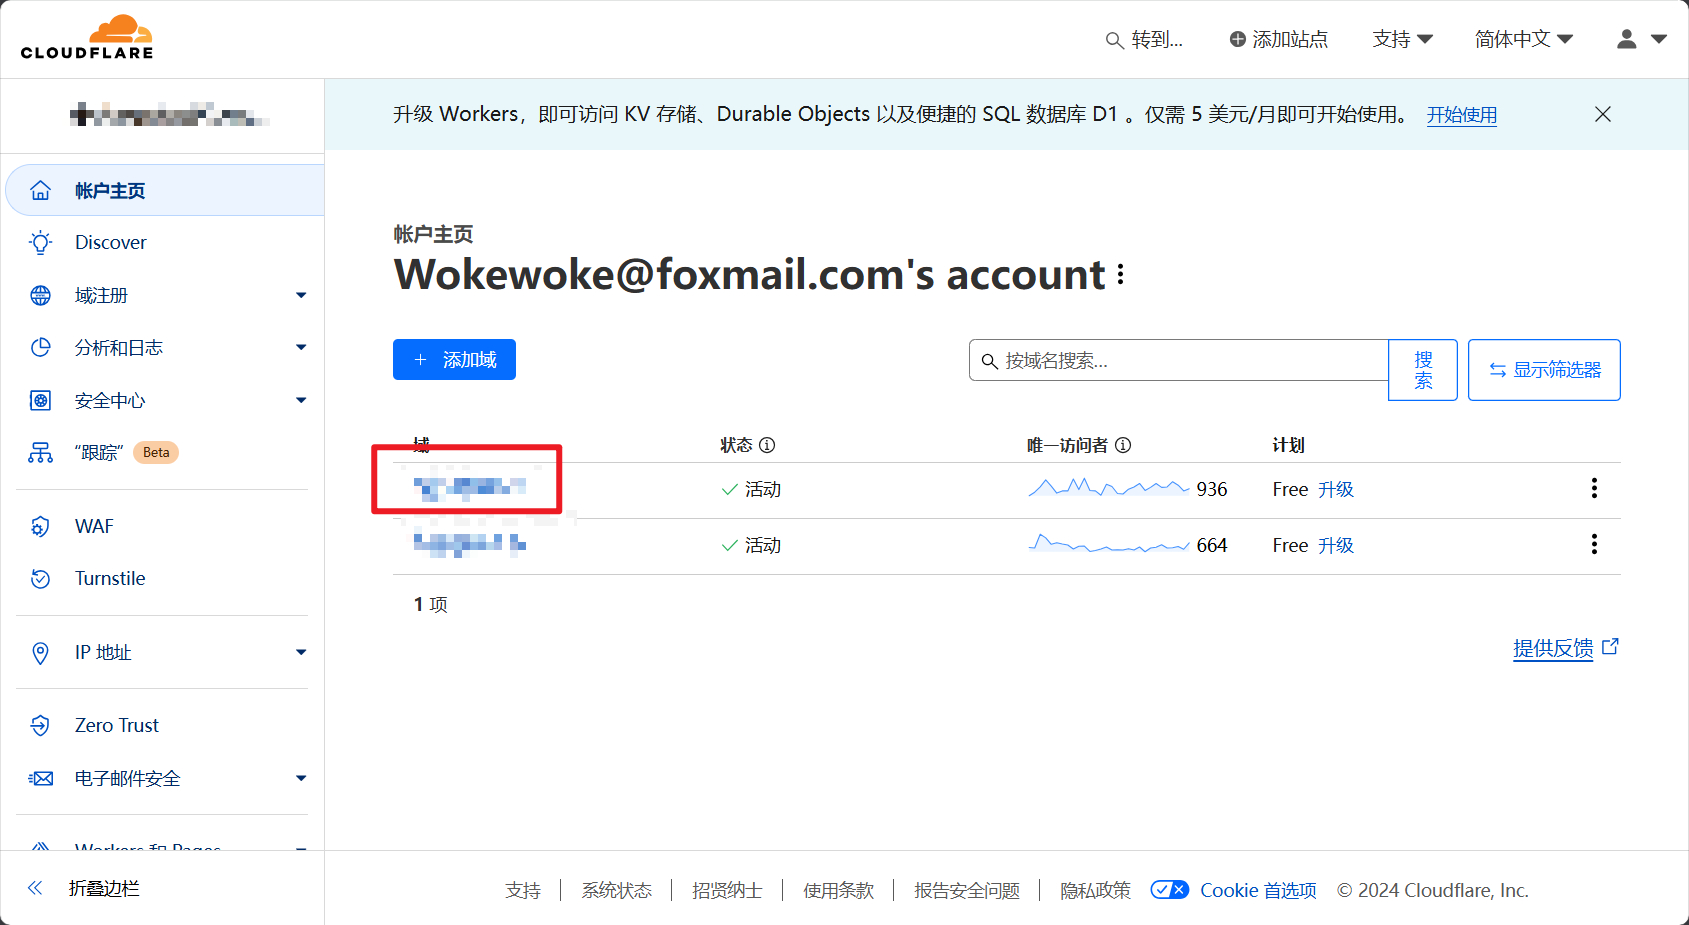 文章源自奇客源码-https://www.qkget.cn/2968.html
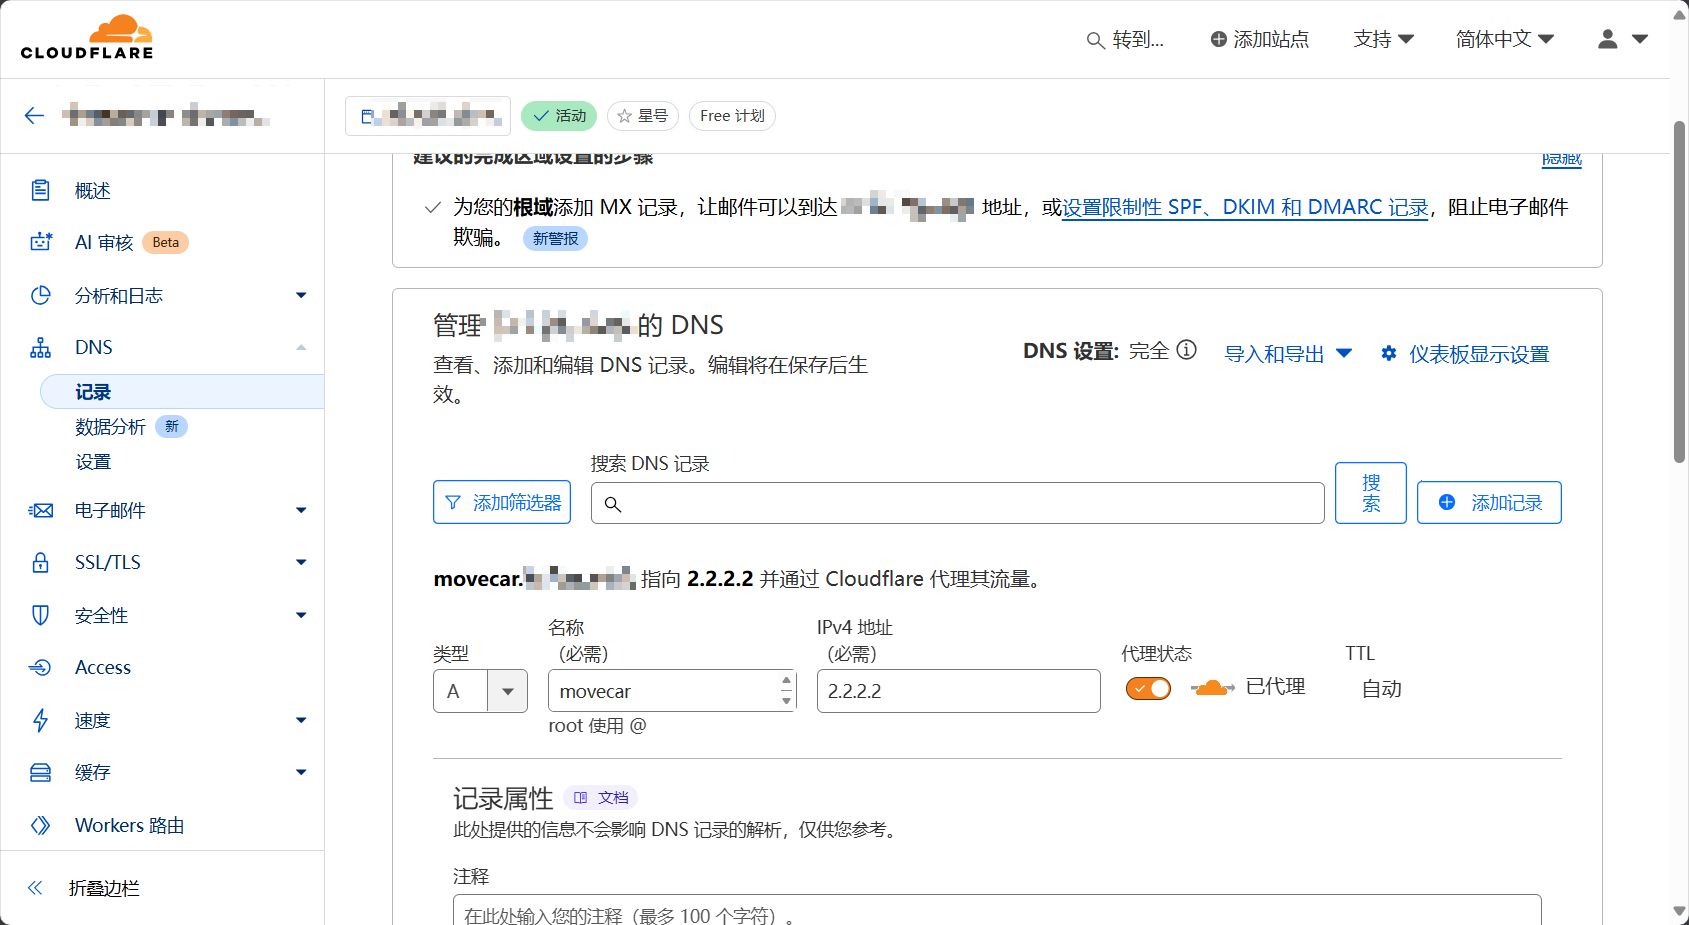
10.单击左侧「DNS」文章源自奇客源码-https://www.qkget.cn/2968.html
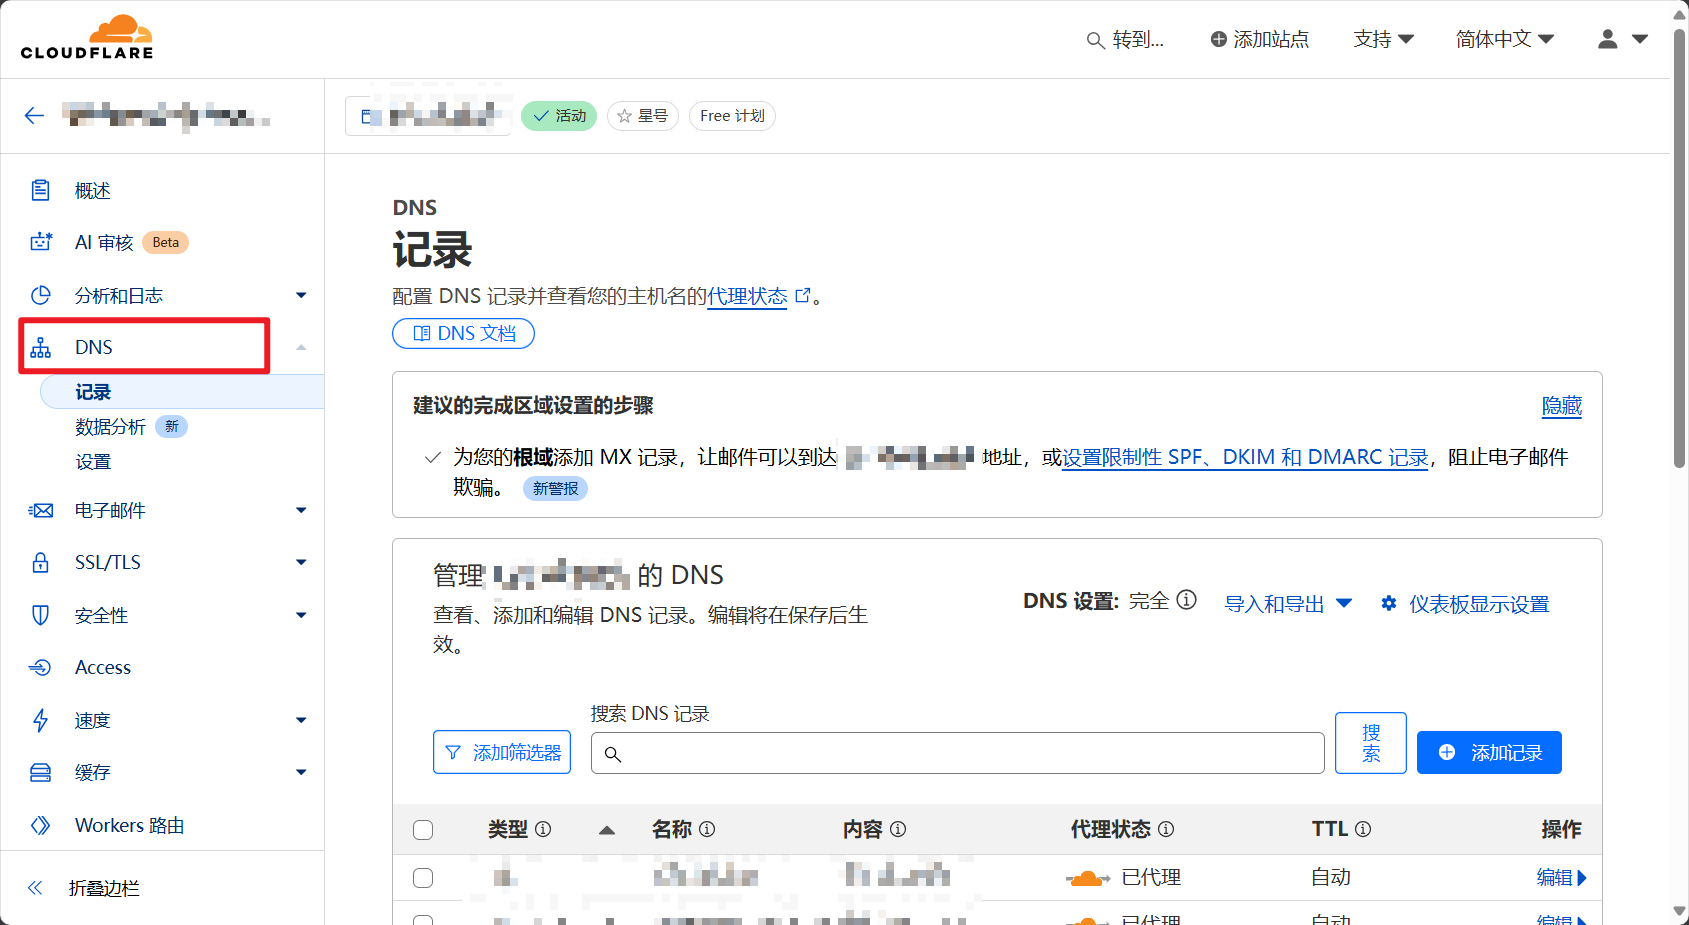 文章源自奇客源码-https://www.qkget.cn/2968.html
11.单击「添加记录」,类型选择A,名称随意(该名称为二级域名),IPV4随意填写,这里名称我填写movecar,IPV4填写2.2.2.2,填写完成单击「保存」文章源自奇客源码-https://www.qkget.cn/2968.html
 文章源自奇客源码-https://www.qkget.cn/2968.html
12.单击左侧「Workers 路由」,「添加路由」,路由填写刚才设置的二级域名,Worker选择刚才创建的Worker,这里我的路由填写movecar.**.com,Worker选择movecar,单击「保存」文章源自奇客源码-https://www.qkget.cn/2968.html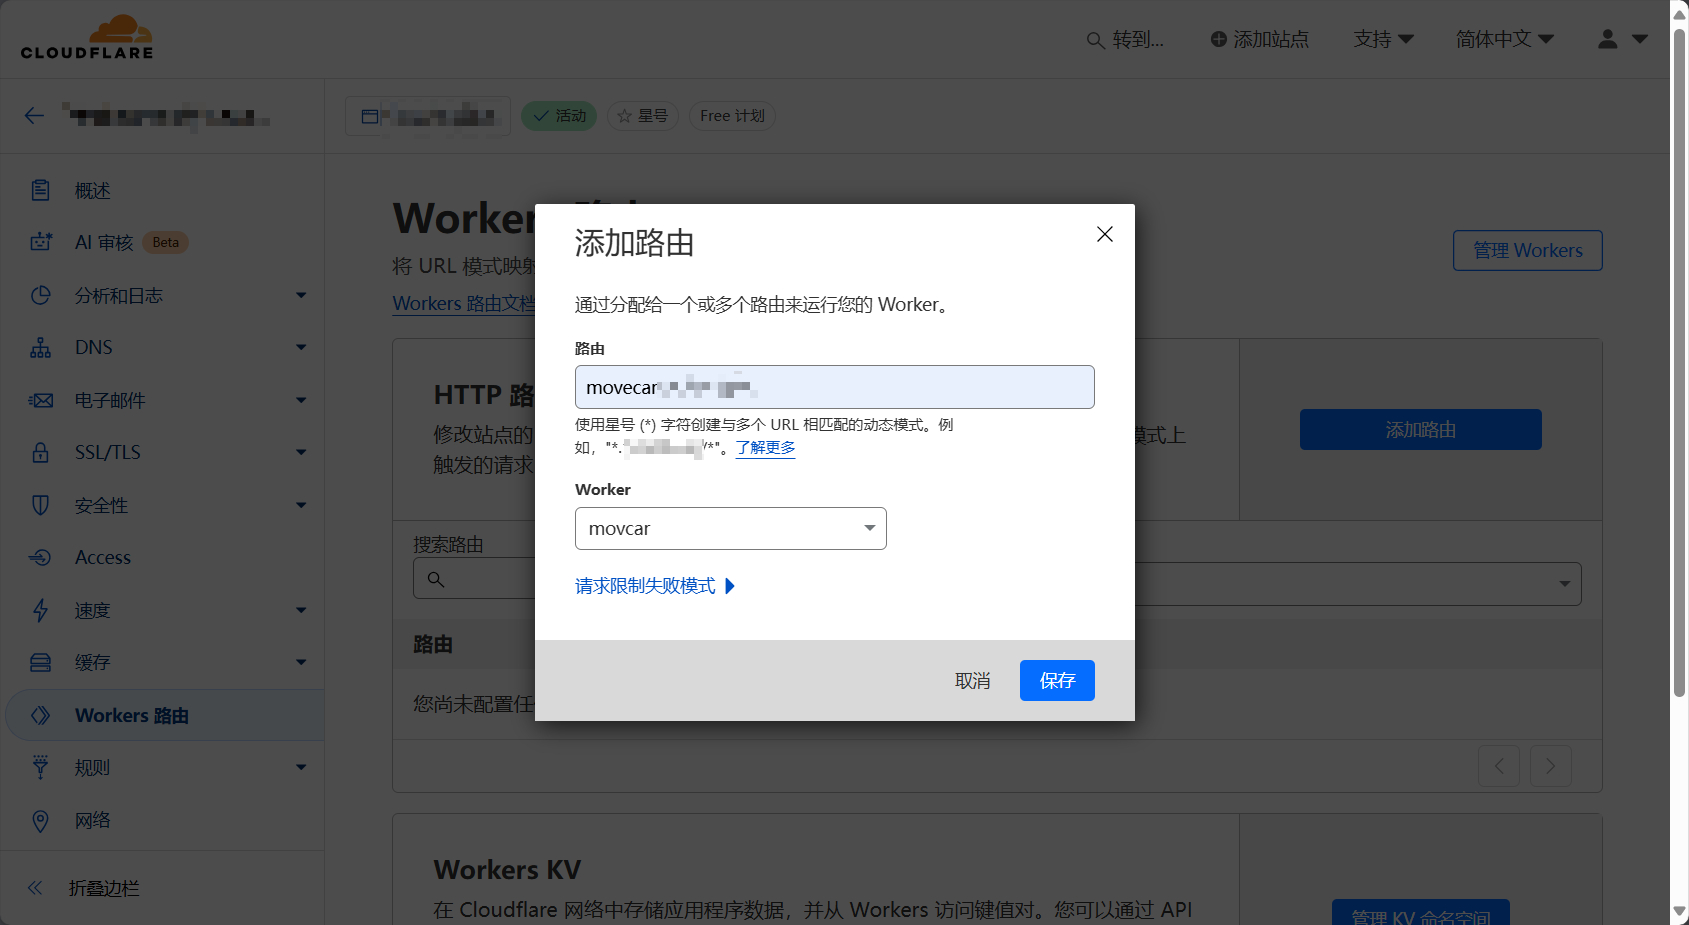
13.保存成功后,尝试访问设定好的域名,单击「通知车主挪车」,测试是否正常发送文章源自奇客源码-https://www.qkget.cn/2968.html
 文章源自奇客源码-https://www.qkget.cn/2968.html
以上就是利用Cloudflare Workers部署挪车页面的过程了,码字不易,请多多支持!文章源自奇客源码-https://www.qkget.cn/2968.html
本文链接:
版权声明:知识共享署名-相同方式共享 4.0 国际 (CC BY-NC-SA 4.0)协议进行许可
本站资源仅供个人学习交流,转载时请以超链接形式标明文章原始出处,(如有侵权联系删除)


 子比主题美化
 精品源码资源


暂无评论内容